In this walk through, we will be going through the Active Reconnaissance room from Tryhackme. After completing this room, you will be able to perform active foot-printing on the targets using numerous techniques. So, let’s get started.

Task 1 – Introduction
Active reconnaissance begins with direct connections made to the target machine. Any such connection might leave information in the logs showing the client IP address, time of the connection, and duration of the connection, among other things. However, not all connections are suspicious.
In this room, we go through various tools commonly bundled with most operating systems or easily obtainable. We begin with the web browser and its built-in developer tools; furthermore, we show you how a web browser can be “armed” to become an efficient reconnaissance framework. Afterwards, we discuss other benign tools such as ping, traceroute, and telnet. All these programs require connection to the target, and hence our activities would fall under active reconnaissance.

Task 2 – Web Browser
Question 1 – Browse to the following website and ensure that you have opened your Developer Tools on AttackBox Firefox, or the browser on your computer. Using the Developer Tools, figure out the total number of questions.
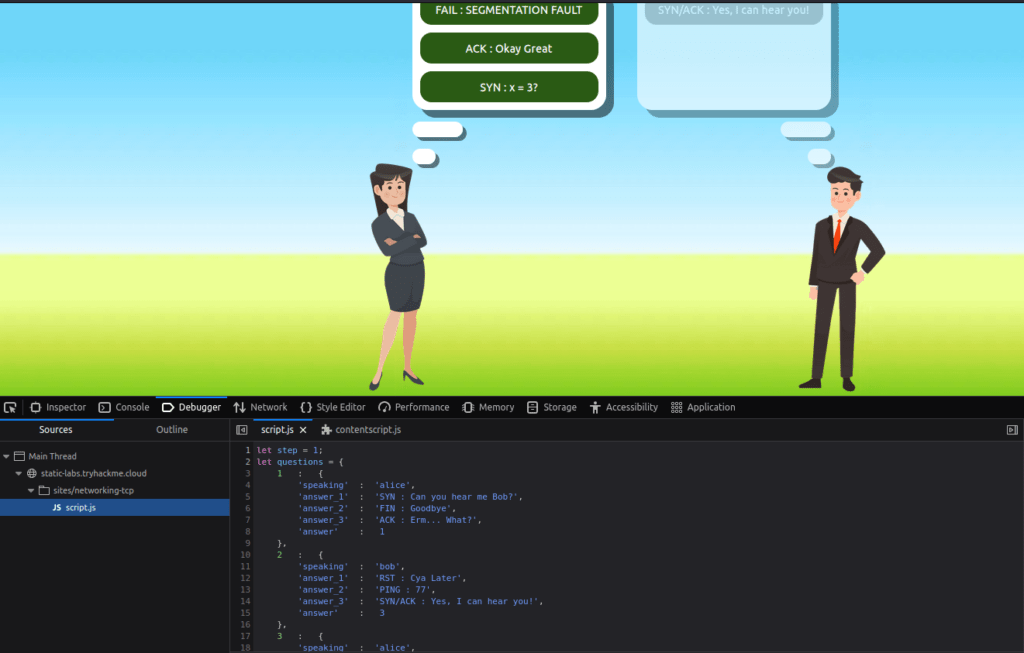

8
Task 3 – Ping
Question 1 – Which option would you use to set the size of the data carried by the ICMP echo request?

-s
Question 2 – What is the size of the ICMP header in bytes?

8
Question 3 – Does MS Windows Firewall block ping by default? (Y/N)
Y
Question 4 – Deploy the VM for this task and using the AttackBox terminal, issue the command ping -c 10 10.10.125.161. How many ping replies did you get back?
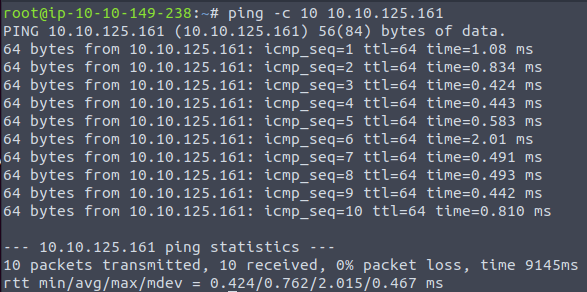
10

Task 4 – Traceroute
Question 1 – In Traceroute A, what is the IP address of the last router/hop before reaching tryhackme.com?

172.67.69.208
Question 2 – In Traceroute B, what is the IP address of the last router/hop before reaching tryhackme.com?

104.26.11.229
Question 3 – In Traceroute B, how many routers are between the two systems?
26
Question 4 – Start the attached VM from Task 3 if it is not already started. On the AttackBox, run traceroute 10.10.125.161. Check how many routers/hops are there between the AttackBox and the target VM.

Done

Task 5 – Telnet

telnet <domain or IP> 80
Get / HTTP/1.1
host: example
Question 1 – Start the attached VM from Task 3 if it is not already started. On the AttackBox, open the terminal and use the telnet client to connect to the VM on port 80. What is the name of the running server?
Apache
Question 2 – What is the version of the running server (on port 80 of the VM)?
2.4.10

Task 6 – Netcat
Question 1 – Start the VM and open the AttackBox. Once the AttackBox loads, use Netcat to connect to the VM port 21. What is the version of the running server?

0.17

Task 7 – Putting It All Together


Also read: Tryhackme – Active Directory Basics

So that was it. Now, you are ready to perform active reconnaissance against targets using Web browsers, Checking live systems using Ping and Banner grabbing using Telnet and Netcat. I’ll be covering more rooms related to reconnaissance, enumeration and vulnerability analysis later. So stay tuned and till then, “Hack the planet”.

